Setup NGINX HTTP Server on Debian 10
You want to host your own blog or a website for your personal project, but you don’t want to use shared hosting?
Host your website on an own Virtual Private Server (VPS). You can use any of the many cloud service providers (like AWS, Google Cloud Platform, Microsoft Azure, Linode, digitalocean) to spin up a VPS which will serve your content.
This content could be dynamically created by a content management system (CMS, like WordPress) or as static HTML files (created by you as HTML/CSS files in an editor or using static site generators like Jekyll or Hugo)
In this blog post we’ll use the web server NGINX in Debian Linux 10 to server your content. Other web server which could be used are Apache HTTP Server or Microsoft IIS (if you’re using windows server).
We will also set up a free Let’s Encrypt certificate so that you are able to serve all your content over a secure HTTPS connection.
Prerequisite
- a running Debian 10 linux server with a public IP. You should have shell access to the server (e.g. via SSH)
- a valid DNS A record for the needed domain (we will use the example URL www.exmpl.xyz).
1. Installing NGINX & configure insecure HTTP hosting
log in into your VPS as root or use sudo in front of all commands below.
update your APT repository:
sudo apt-get updateinstall the NGINX HTTP server:
sudo apt-get install nginxchange into the NGINX sites-enabled config directory:
cd /etc/nginx/sites-enabled/delete the existing default config (file: default):
rm defaultcreate a new configuration for NGINX to listening to HTTP requests on port 80 for the URL www.exmpl.xyz (file: www.exmpl.xyz.conf):
nano www.exmpl.xyz.confwith the following content:
server {
	listen 80;
	server_name www.exmpl.xyz;

	root /var/www/www.exmpl.xyz;
	index index.html;

	location / {
		try_files $uri $uri/ =404;
	}
}
restart your NGINX server:
service nginx restartcreate the specific root directory where all the HTML/CSS files are served from & copy the default index.html file into it:
mkdir /var/www/www.exmpl.xyz
cd /var/www/www.exmpl.xyz
cp ../html/index.nginx-debian.html index.html
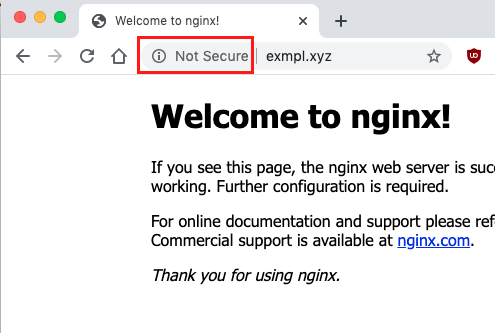
Now you should be able to reach your HTTP server under the chosen URL (here it is: http://www.exmpl.xyz/).

But this is not ideal because the traffic between the website visitor and the NGINX server is only taking place over HTTPS and is thus not encrypted (which is not good).
This is something we’ll fix in the next section.
2. Setting up Let’s Encrypt certificate & config NGINX to serve content over HTTPS
install the necessary certbot script to create the Let’s Encrypt certificate:
apt-get install python-certbot-nginxstart the automatic creation of the Let’s Encrypt certificate & the setup of the NGINX HTTPS server:
certbot --nginx -d www.exmpl.xyzThe script will perform all the needed steps for you but you have to provide an e-mail address. Furthermore you should choose the option to configure NGINX to redirect all insecure HTTP traffic to encryped HTTPS.
Saving debug log to /var/log/letsencrypt/letsencrypt.log
Plugins selected: Authenticator nginx, Installer nginx
Enter email address (used for urgent renewal and security notices) (Enter 'c' to
cancel): ********@********.com

- - - - - - - - - - - - - - - - - - - - - - - - - - - - - - - - - - - - - - - -
Please read the Terms of Service at
https://letsencrypt.org/documents/LE-SA-v1.2-November-15-2017.pdf. You must
agree in order to register with the ACME server at
https://acme-v02.api.letsencrypt.org/directory
- - - - - - - - - - - - - - - - - - - - - - - - - - - - - - - - - - - - - - - -
(A)gree/(C)ancel: A

- - - - - - - - - - - - - - - - - - - - - - - - - - - - - - - - - - - - - - - -
Would you be willing to share your email address with the Electronic Frontier
Foundation, a founding partner of the Let's Encrypt project and the non-profit
organization that develops Certbot? We'd like to send you email about our work
encrypting the web, EFF news, campaigns, and ways to support digital freedom.
- - - - - - - - - - - - - - - - - - - - - - - - - - - - - - - - - - - - - - - -
(Y)es/(N)o: N
Obtaining a new certificate
Performing the following challenges:
http-01 challenge for www.exmpl.xyz
Waiting for verification...
Cleaning up challenges
Deploying Certificate to VirtualHost /etc/nginx/sites-enabled/www.exmpl.xyz.conf

Please choose whether or not to redirect HTTP traffic to HTTPS, removing HTTP access.
- - - - - - - - - - - - - - - - - - - - - - - - - - - - - - - - - - - - - - - -
1: No redirect - Make no further changes to the webserver configuration.
2: Redirect - Make all requests redirect to secure HTTPS access. Choose this for
new sites, or if you're confident your site works on HTTPS. You can undo this
change by editing your web server's configuration.
- - - - - - - - - - - - - - - - - - - - - - - - - - - - - - - - - - - - - - - -
Select the appropriate number [1-2] then [enter] (press 'c' to cancel): 2
Redirecting all traffic on port 80 to ssl in /etc/nginx/sites-enabled/www.exmpl.xyz.conf

- - - - - - - - - - - - - - - - - - - - - - - - - - - - - - - - - - - - - - - -
Congratulations! You have successfully enabled https://www.exmpl.xyz

You should test your configuration at:
https://www.ssllabs.com/ssltest/analyze.html?d=www.exmpl.xyz
- - - - - - - - - - - - - - - - - - - - - - - - - - - - - - - - - - - - - - - -

IMPORTANT NOTES:
 - Congratulations! Your certificate and chain have been saved at:
   /etc/letsencrypt/live/www.exmpl.xyz/fullchain.pem
   Your key file has been saved at:
   /etc/letsencrypt/live/www.exmpl.xyz/privkey.pem
   Your cert will expire on 2020-08-22. To obtain a new or tweaked
   version of this certificate in the future, simply run certbot again
   with the "certonly" option. To non-interactively renew *all* of
   your certificates, run "certbot renew"
 - Your account credentials have been saved in your Certbot
   configuration directory at /etc/letsencrypt. You should make a
   secure backup of this folder now. This configuration directory will
   also contain certificates and private keys obtained by Certbot so
   making regular backups of this folder is ideal.
 - If you like Certbot, please consider supporting our work by:

   Donating to ISRG / Let's Encrypt:   https://letsencrypt.org/donate
   Donating to EFF:                    https://eff.org/donate-le
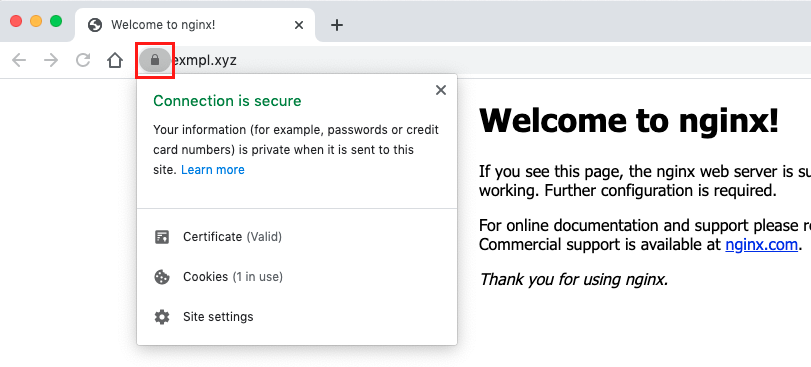
Now you should be able to access your content over the encrypted HTTPS connection. All the insecure HTTP traffic will be automatically redirected to the HTTPS URL.

You can now place your files you want to be provided by the HTTP server (e.g. HTML/CSS files) under /var/www/www.exmpl.xyz.
Conclusion
In this article I’ve shown you how to setup a NGINX HTTP Server on Debian 10 in a quick way to serve your static content over a secure HTTPS connection to your visitors.
↑ back to top ↑